
Color is one of the most important elements in embroidery design. It affects how a logo, name, pattern, or artwork looks once it is stitched onto fabric. During Embroidery Digitizing, every color change has to be planned carefully because thread colors are not simply visual choices. They can also influence stitch order, thread changes, design quality, production time, and the final appearance of the embroidered piece.
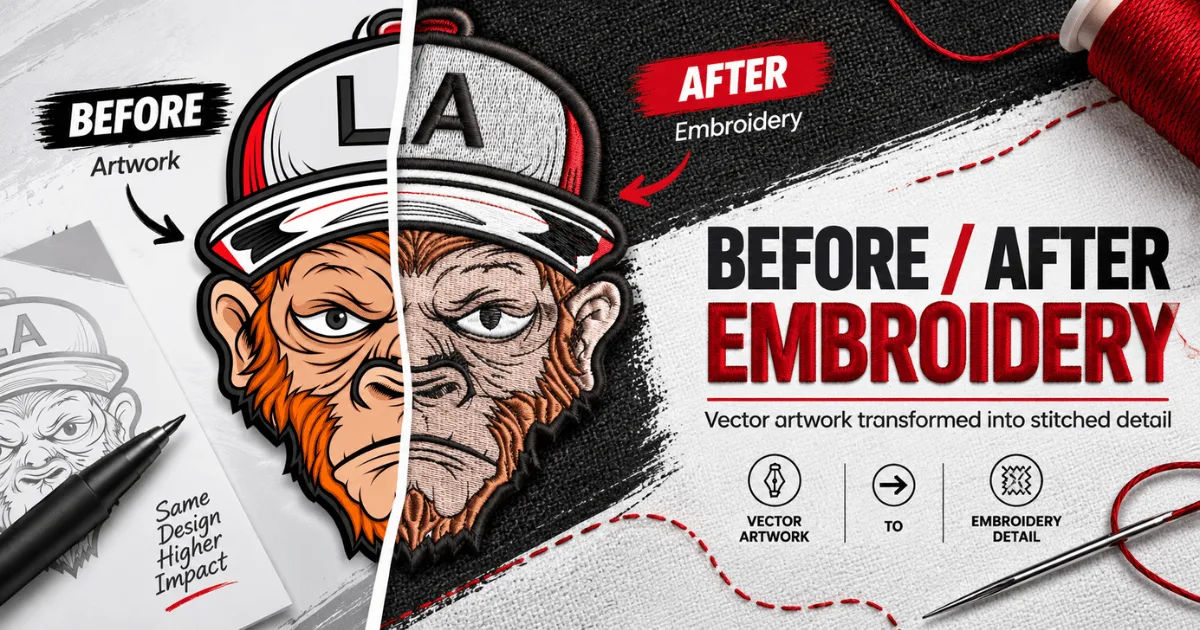
A well-planned embroidery design can use several colors without becoming difficult to produce. However, unnecessary color changes can increase machine stops, thread trimming, and production costs. Understanding how color changes work helps designers and embroiderers create cleaner, more efficient, and more attractive designs.
What Is a Color Change in Embroidery?
A color change occurs when an embroidery machine stops using one thread color and switches to another. For example, a logo may begin with blue lettering, followed by a red symbol and then a black outline.
Each transition between these colors is considered a color change.
Modern embroidery machines can perform these changes automatically when the design file contains the correct information. However, the digitized file must tell the machine exactly when to stop, trim, change thread, and continue stitching.
This is why color planning is an important part of the digitizing process.
Why Color Changes Matter
Color changes affect much more than the visual appearance of a design. They can influence:
- Production speed
- Number of machine stops
- Thread consumption
- Design complexity
- Stitch efficiency
- Manufacturing costs
- Final embroidery quality
- Overall appearance
A design with ten colors may look impressive on a computer screen, but it may take considerably longer to produce than a similar design using four carefully selected colors.
How Color Changes Affect Stitch Order
Stitch order determines which parts of an embroidery design are sewn first, second, third, and so on. Color selection often works together with stitch order.
For example, imagine a logo containing a yellow background, green leaves, red flowers, and black outlines. A digitizer has to decide not only which thread colors to use but also how those colors should be stitched.
Poor sequencing can create unnecessary jumps, trims, and overlapping stitches.
Creating a Logical Stitch Sequence
A logical sequence usually moves through the design in a way that minimizes unnecessary machine movement.
For example, if several areas use the same color, they may be arranged together where practical. This can reduce the number of thread changes.
The goal is not simply to use fewer colors. The goal is to organize the colors intelligently.
Sometimes changing thread color is necessary to achieve the correct visual result. In other cases, a digitizer may discover that two similar areas can use the same thread without noticeably affecting the artwork.
The Relationship Between Color and Thread Changes
Every additional thread color can create another machine interruption.
Suppose a design uses:
- Red
- Blue
- Green
- Yellow
- White
- Black
If these colors are used in separate sections, the embroidery machine may need to stop several times during production.
Each stop can involve trimming the existing thread and loading or selecting another thread.
More Colors Can Mean More Production Time
The actual increase in production time depends on the embroidery machine, design layout, automatic thread-changing features, and the number of transitions.
Still, reducing unnecessary color changes is generally beneficial.
For commercial embroidery, even a small time saving can become significant when hundreds or thousands of garments are being produced.
This makes efficient color planning especially valuable for large orders.
Color Changes and Embroidery Quality
Color changes can also affect quality. When a thread is changed, the machine needs to restart stitching accurately.
If the design is poorly digitized, repeated starts and stops may result in visible imperfections.
These may include:
- Small gaps
- Uneven outlines
- Thread buildup
- Misalignment
- Loose stitches
- Excessive trimming
- Visible connection points
Good Embroidery Digitizing reduces these problems by controlling stitch direction, sequencing, trims, and thread changes.
Avoiding Unnecessary Thread Buildup
Using multiple colors can sometimes cause several layers of stitches to overlap.
If a digitizer places too many stitches in the same area, the fabric may become stiff or distorted.
Color changes should therefore be considered alongside stitch density.
A color should not automatically receive a completely new layer of dense stitching simply because it appears as a separate color in the original artwork.
How Similar Colors Should Be Handled
Sometimes a design contains several shades that appear very similar.
For example, an artwork might contain light blue, medium blue, and dark blue.
Using three different thread colors may be appropriate if the shades create important depth or visual separation. However, if the differences are extremely subtle, using fewer colors may produce a cleaner result.
Choosing the Right Thread Shades
Thread does not always look exactly like its digital representation.
Screen colors are produced with light, while embroidery thread reflects light from its physical surface. As a result, a color that looks perfect on a monitor may appear slightly different when stitched.
Professional digitizers consider the actual thread palette available for production.
They also consider the fabric color because the background can change how a thread shade appears.
The Importance of Fabric Color
The same thread can look completely different depending on the fabric underneath it.
For example, white thread generally stands out strongly on black fabric. On white fabric, however, it may have very little contrast.
Similarly, a dark blue thread can appear clear on a light gray garment but may become difficult to see on navy fabric.
Adjusting Colors for Dark Fabrics
Dark garments often require careful color selection.
A logo that works perfectly on a white shirt may need adjustments for a black jacket.
Sometimes a lighter outline or stronger contrast is needed. In other situations, an underlay or different stitch approach can help improve visibility.
This means color decisions should be made with the final garment in mind rather than the artwork alone.
Color Changes in Small Embroidery Designs
Small embroidery designs require particularly careful color management.
At a small size, tiny details may not have enough room for separate colors.
For example, a small logo may contain several thin colored lines. If each line receives its own thread color, the final embroidery could become crowded.
Simplifying Small Designs
A digitizer may simplify certain details to preserve readability.
Instead of using five nearly identical colors, a smaller design might use two or three stronger colors.
This does not mean sacrificing the identity of the artwork. It means adapting the artwork to the physical limitations of embroidery.
Effective Embroidery Digitizing transforms artwork into stitches that work well at the intended size.
Color Changes in Large Embroidery Designs
Large designs provide more room for detailed color work.
A jacket back, large chest design, or decorative textile piece may support many shades and color transitions.
However, large designs can also contain thousands of stitches.
Adding unnecessary colors can increase production time substantially.
Managing Complex Color Palettes
For large designs, it helps to group colors logically.
A digitizer can examine the entire design and identify areas where the same thread can be used efficiently.
This reduces unnecessary transitions while maintaining the intended appearance.
The most effective approach balances artistic accuracy with production efficiency.
How Color Changes Affect Thread Consumption
Different thread colors do not necessarily consume equal amounts of thread because thread consumption depends primarily on stitch count and stitch structure.
However, every color change may involve additional thread used for starts, stops, trims, and connections.
If a design contains many tiny sections in different colors, the amount of waste can increase.
Reducing Thread Waste
Efficient sequencing can help reduce unnecessary thread waste.
A digitizer can avoid excessive trims and unnecessary jumps where the design allows.
This is especially important in commercial production because small amounts of wasted thread can add up over a large number of garments.
Color Changes and Machine Performance
Embroidery machines are designed to handle thread changes, but inefficient files can still make production more complicated.
A well-prepared file provides clear instructions about color order and machine operations.
Poorly prepared files may contain unnecessary color stops or sequencing problems.
Automatic Versus Manual Thread Changes
Some machines have multiple needle positions and can automatically switch between assigned colors.
Other machines may require more manual involvement.
The machine being used should therefore be considered during Embroidery Digitizing.
A file that is efficient for one machine setup may require adjustments for another.
How Color Changes Affect Pricing
Color complexity can influence embroidery pricing, particularly for large production orders.
Embroidery services often consider factors such as stitch count, number of pieces, design complexity, and production time.
Although color count alone does not determine price, frequent color changes can increase machine handling and production time.
Why Efficient Digitizing Saves Money
Suppose two designs have approximately the same stitch count.
One requires three thread changes while another requires twelve.
The second design may take longer to produce because of the additional stops and transitions.
For businesses ordering embroidered uniforms, promotional products, caps, or branded apparel, efficient color management can contribute to lower production costs.
Color Changes and Design Registration
Registration refers to how accurately different parts of an embroidery design line up.
When several colors meet at specific boundaries, accurate registration becomes important.
For example, a red shape surrounded by a black outline needs the two elements to align properly.
Preventing Visible Gaps
If the fabric shifts slightly or the design is poorly sequenced, small gaps can appear between colors.
Good digitizing considers fabric movement and stitch behavior.
Underlay, pull compensation, stitch direction, and sequencing can all help improve registration.
Color changes therefore need to be planned alongside the technical characteristics of embroidery.
The Role of Underlay in Multicolor Designs
Underlay stitches are placed beneath the visible stitches to stabilize fabric and provide a foundation.
When several colors are used, underlay becomes particularly important in maintaining structure.
Without appropriate underlay, fabric can shift or distort as different sections are stitched.
Balancing Underlay and Top Stitches
Too little underlay may result in poor coverage and unstable embroidery.
Too much underlay can increase stitch count and make the design unnecessarily heavy.
A skilled digitizer chooses an appropriate underlay strategy based on the fabric, design size, stitch type, and thread coverage.
Converting Artwork With Many Colors
Digital artwork may contain dozens or even hundreds of colors because graphic design software can represent subtle gradients and shades.
Embroidery thread has practical limitations.
A digitizer usually needs to interpret the artwork and determine which colors are actually necessary.
Gradients Require Special Attention
Embroidery machines cannot reproduce digital gradients in exactly the same way as a screen.
Instead, a digitizer may simulate gradual color transitions using different thread shades, stitch patterns, or controlled blending.
In some designs, a gradient can be simplified to create a cleaner embroidered result.
This is another reason why direct automatic conversion from artwork to stitches may not always produce professional results.
Best Practices for Managing Color Changes
Several practices can improve the efficiency and quality of multicolor embroidery.
Use Only Necessary Colors
Avoid adding colors simply because they appear slightly different in the original artwork.
Every thread color should have a purpose.
Group Similar Areas
When possible, organize sections that use the same color so the machine does not repeatedly switch between the same threads.
Consider the Garment
Always evaluate colors against the actual fabric.
A design should remain readable and visually balanced after stitching.
Maintain Good Stitch Sequencing
Color order should support clean transitions and reduce unnecessary trims and jumps.
Test Complex Designs
A sample stitch-out is extremely useful for designs containing many colors.
It reveals problems that may not be obvious on a computer screen.
Common Mistakes With Color Changes
One common mistake is assuming that more colors automatically produce a more detailed design.
In reality, excessive colors can make embroidery complicated without improving its appearance.
Another mistake is ignoring the fabric color.
A third mistake is allowing automatic digitizing software to decide every color and stitch detail without manual refinement.
Relying Too Much on Automatic Conversion
Automatic tools can help create an initial embroidery file, but they may not understand the practical requirements of every design.
They can produce unnecessary color stops, poor stitch sequencing, excessive density, or awkward transitions.
Manual editing is often needed for professional results.
How to Optimize Color Changes in Embroidery Digitizing
Optimization starts by examining the artwork before converting it into stitches.
Identify the main colors, secondary colors, outlines, small details, and areas where colors overlap.
Then determine which colors are essential.
Next, create an efficient stitch sequence.
Finally, review the file for unnecessary trims, jumps, color stops, and overlapping stitches.
A good Embroidery Digitizing workflow treats color as both an artistic and technical element.
Why Professional Digitizing Matters
Professional digitizing involves much more than tracing artwork.
The digitizer needs to understand thread behavior, fabric characteristics, stitch types, machine limitations, density, pull compensation, underlay, and color sequencing.
This expertise becomes particularly important when a design contains many colors.
A professionally digitized file can preserve the character of the original artwork while making the design practical for embroidery production.
Conclusion
Color changes have a direct impact on the appearance, efficiency, cost, and quality of embroidered designs. While additional colors can create depth and visual detail, unnecessary color transitions can increase machine stops, thread handling, production time, and the possibility of stitching problems.
The best approach is to use colors deliberately. Each thread should contribute to the design rather than simply reproduce every tiny color variation found in digital artwork.
Fabric color, design size, stitch density, thread selection, machine capabilities, and stitch order should all be considered together. A successful design is not simply one that looks attractive on a screen. It must also perform well when converted into physical stitches.
Ultimately, effective Embroidery Digitizing creates a balance between artistic accuracy and production efficiency. Thoughtful color planning helps embroidery machines work more smoothly while producing designs that are clean, readable, durable, and visually appealing.
When color changes are properly managed, even complex multicolor artwork can be transformed into professional embroidery without unnecessary complications. The key is careful planning, appropriate thread selection, efficient sequencing, and testing before large-scale production.